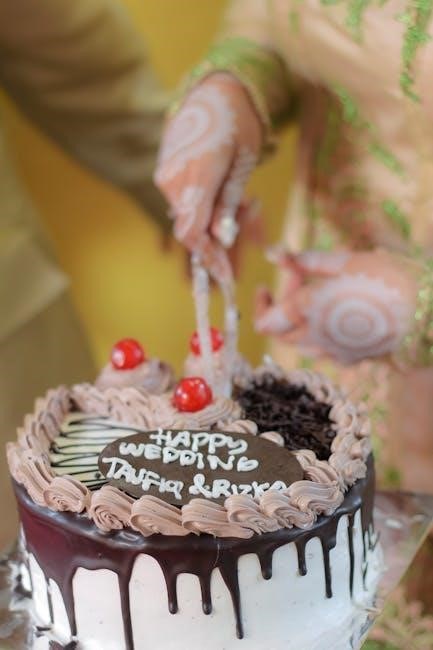
Cake cutting is an art that ensures even distribution and perfect slices. It involves precision, the right tools, and techniques tailored to different cake shapes and sizes.
1.1 Overview of Cake Cutting Importance
Proper cake cutting ensures even portions, enhancing presentation and professionalism. It prevents waste and breakage, making every slice perfect. This skill is vital for any celebration, guaranteeing a polished and enjoyable experience for all guests.
1.2 Basic Preparation Steps
Trim the cake edges and clean the knife for smooth cuts. Score the surface to guide your knife. Spread filling evenly and apply a crumb coat. Frost the cake and mark cutting lines. These steps ensure a polished presentation and even portions, making the cutting process efficient and professional.
Tools and Equipment Needed
A long serrated knife, cake stand, and cutting board are essentials. Optional tools include a cake server and icing smoother for precise portioning and smooth frosting removal.
2.1 Essential Tools for Cutting
A long serrated knife is crucial for even cuts. A cake stand offers easy access and rotation. A cutting board provides stability. Optional tools include a cake server and icing smoother. A spatula aids in scoring the surface for precise cuts, ensuring clean slices and professional results.
2.2 Choosing the Right Knife
Selecting the right knife is vital for smooth, even cuts. A long serrated knife is ideal for round cakes, while a sharp chef’s knife works well for square or tiered cakes. Ensure the knife is clean and sharp to prevent crumbling. For layer cakes, a serrated offset knife is recommended for precise, horizontal cuts. Proper knife choice enhances both presentation and serving efficiency.
Methods for Different Cake Shapes
Round, square, and tiered cakes require unique cutting techniques. Scoring surfaces and using serrated knives ensure clean cuts. Each shape demands precision for even, visually appealing slices.
3.1 Cutting Round Cakes
Cutting round cakes involves scoring the surface with a serrated knife to guide even slices. Start by cutting a concentric circle pattern for uniform portions; For larger cakes, use a grid method to ensure equal distribution. Always use a sharp, long knife to slice through all layers in one motion, ensuring clean cuts and a professional presentation every time.
3.2 Cutting Square or Sheet Cakes
Cutting square or sheet cakes requires precision to achieve uniform slices. Begin by scoring the cake surface with a serrated knife to guide your cuts. Use a long, thin knife to make vertical cuts along the length, dividing the cake into equal sections. Follow with horizontal cuts across the width to create smaller, uniform slices. Ensure the cake is completely cooled and firm before cutting, and use a slight sawing motion to avoid applying too much pressure. Clean the knife after each cut to prevent transferring crumbs and frosting. For larger cakes, consider using a grid pattern to ensure even distribution. Portion sizes can vary based on the event, with smaller slices for parties and larger ones for special occasions. Chilling the cake briefly can firm up the frosting, making it easier to slice cleanly. For precise cuts, especially around the edges, consider using a cake cutter, wire, or even dental floss. If the cake has multiple layers, cut each layer separately to maintain evenness. Avoid pressing too hard to prevent compressing the cake, which can make slices dense. Practice on a smaller cake first to build confidence and technique. Arrange slices neatly on a serving platter or individual plates, and garnish with fresh fruit or powdered sugar for an appealing presentation.
3.3 Cutting Tiered Cakes
Cutting tiered cakes requires precision to maintain stability and evenness. Start by slicing through the bottom tier horizontally, using a long serrated knife. Make vertical cuts along the length, then horizontal cuts across the width for uniform slices. Use a cake stand or turntable for accessibility. Ensure each tier is cut separately, avoiding pressure that could destabilize the structure. Clean the knife between cuts to prevent crumbs and frosting transfer, and use a guide or template for precision. For standard portion sizes, aim for slices about 1 inch wide. Arrange the slices attractively on a serving platter or individual plates for a polished presentation. Chilling the cake briefly can help firm the frosting, making it easier to achieve clean cuts. Maintain evenness across all tiers for a professional finish. Use a cake cutter or wire for precise edges, especially around intricate designs. For multi-layered tiers, cut each layer separately to preserve structure. Avoid applying too much pressure, which can compress the cake and make slices dense. Practice on smaller tiered cakes to refine your technique. Consider using dental floss for smooth, even cuts through soft layers. If the cake has decorations, slice around them carefully to maintain their integrity. Portion sizes can vary based on the event, with smaller slices for large gatherings and larger ones for intimate settings. Garnish with fresh fruit or powdered sugar for an appealing presentation. Ensure the cake is completely cooled and firm before cutting, as this will help prevent crumbling and breakage. Use a slight sawing motion to avoid tearing the cake. For precise cuts, especially around the edges, consider using a cake cutter, wire, or even dental floss. If the cake has multiple layers, cut each layer separately to maintain evenness. Avoid pressing too hard to prevent compressing the cake, which can make slices dense. Practice on a smaller cake first to build confidence and technique. Arrange slices neatly on a serving platter or individual plates, and garnish with fresh fruit or powdered sugar for an appealing presentation. Use a cake stand or turntable for accessibility. Ensure each tier is cut separately, avoiding pressure that could destabilize the structure. Clean the knife between cuts to prevent crumbs and frosting transfer, and use a guide or template for precision. For standard portion sizes, aim for slices about 1 inch wide. Arrange the slices attractively on a serving platter or individual plates for a polished presentation. Chilling the cake briefly can help firm the frosting, making it easier to achieve clean cuts. Maintain evenness across all tiers for a professional finish. Use a cake cutter or wire for precise edges, especially around intricate designs. For multi-layered tiers, cut each layer separately to preserve structure. Avoid applying too much pressure, which can compress the cake and make slices dense. Practice on smaller tiered cakes to refine your technique. Consider using dental floss for smooth, even cuts through soft layers. If the cake has decorations, slice around them carefully to maintain their integrity. Portion sizes can vary based on the event, with smaller slices for large gatherings and larger ones for intimate settings. Garnish with fresh fruit or powdered sugar for an appealing presentation. Ensure the cake is completely cooled and firm before cutting, as this will help prevent crumbling and breakage. Use a slight sawing motion to avoid tearing the cake. For precise cuts, especially around the edges, consider using a cake cutter, wire, or even dental floss. If the cake has multiple layers, cut each layer separately to maintain evenness. Avoid pressing too hard to prevent compressing the cake, which can make slices dense. Practice on a smaller cake first to build confidence and technique. Arrange slices neatly on a serving platter or individual plates, and garnish with fresh fruit or powdered sugar for an appealing presentation. Use a cake stand or turntable for accessibility. Ensure each tier is cut separately, avoiding pressure that could destabilize the structure. Clean the knife between cuts to prevent crumbs and frosting transfer, and use a guide or template for precision. For standard portion sizes, aim for slices about 1 inch wide. Arrange the slices attractively on a serving platter or individual plates for a polished presentation. Chilling the cake briefly can help firm the frosting, making it easier to achieve clean cuts. Maintain evenness across all tiers for a professional finish. Use a cake cutter or wire for precise edges, especially around intricate designs. For multi-layered tiers, cut each layer separately to preserve structure. Avoid applying too much pressure, which can compress the cake and make slices dense. Practice on smaller tiered cakes to refine your technique. Consider using dental floss for smooth, even cuts through soft layers. If the cake has decorations, slice around them carefully to maintain their integrity. Portion sizes can vary based on the event, with smaller slices for large gatherings and larger ones for intimate settings. Garnish with fresh fruit or powdered sugar for an appealing presentation. Ensure the cake is completely cooled and firm before cutting, as this will help prevent crumbling and breakage. Use a slight sawing motion to avoid tearing the cake. For precise cuts, especially around the edges, consider using a cake cutter, wire, or even dental floss. If the cake has multiple layers, cut each layer separately to maintain evenness. Avoid pressing too hard to prevent compressing the cake, which can make slices dense. Practice on a smaller cake first to build confidence and technique. Arrange slices neatly on a serving platter or individual plates, and garnish with fresh fruit or powdered sugar for an appealing presentation. Use a cake stand or turntable for accessibility. Ensure each tier is cut separately, avoiding pressure that could destabilize the structure. Clean the knife between cuts to prevent crumbs and frosting transfer, and use a guide or template for precision. For standard portion sizes, aim for slices about 1 inch wide. Arrange the slices attractively on a serving platter or individual plates for a polished presentation. Chilling the cake briefly can help firm the frosting, making it easier to achieve clean cuts. Maintain evenness across all tiers for a professional finish. Use a cake cutter or wire for precise edges, especially around intricate designs. For multi-layered tiers, cut each layer separately to preserve structure. Avoid applying too much pressure, which can compress the cake and make slices dense. Practice on smaller tiered cakes to refine your technique. Consider using dental floss for smooth, even cuts through soft layers. If the cake has decorations, slice around them carefully to maintain their integrity. Portion sizes can vary based on the event, with smaller slices for large gatherings and larger ones for intimate settings. Garnish with fresh fruit or powdered sugar for an appealing presentation. Ensure the cake is completely cooled and firm before cutting, as this will help prevent crumbling and breakage. Use a slight sawing motion to avoid tearing the cake. For precise cuts, especially around the edges, consider using a cake cutter, wire, or even dental floss. If the cake has multiple layers, cut each layer separately to maintain evenness. Avoid pressing too hard to prevent compressing the cake, which can make slices dense. Practice on a smaller cake first to build confidence and technique. Arrange slices neatly on a serving platter or individual plates, and garnish with fresh fruit or powdered sugar for an appealing presentation. Use a cake stand or turntable for accessibility. Ensure each tier is cut separately, avoiding pressure that could destabilize the structure. Clean the knife between cuts to prevent crumbs and frosting transfer, and use
Determining Portion Sizes
Standard cake portions are typically 1 inch wide for a 2-layer cake. Use a grid method for larger cakes to maximize even, thin slices and consistent servings.
4.1 Standard Serving Sizes
Standard cake serving sizes typically range from 1 to 1.5 inches in width for a 2-layer cake. Fruit cake is traditionally cut into 1×1 inch fingers, while sponge cake is often sliced into 2×1 inch portions. For larger cakes, a grid method ensures even distribution, with slices cut into thin rectangles rather than wedges for consistency and fairness.
4.2 Calculating the Number of Slices
To calculate the number of slices, score the cake surface first to guide your cuts. For round cakes, use the concentric circle method, dividing the cake into evenly spaced rings. For square cakes, create a grid pattern. A serrated knife and chilled cake ensure clean cuts. This method guarantees uniform portions, making it easy to serve guests fairly and efficiently.
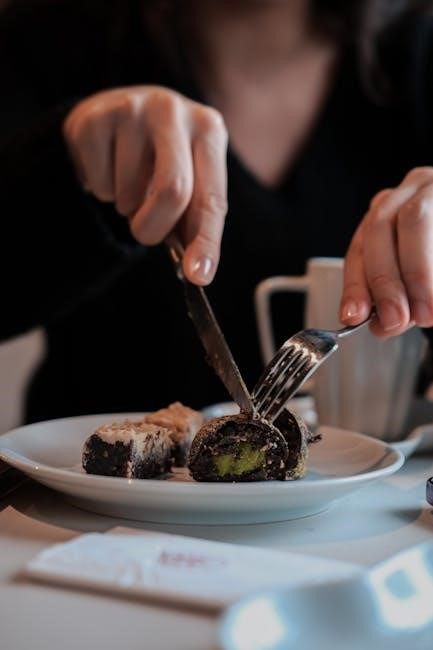
Tips for Clean and Even Slices
Use a sharp serrated knife and chill the cake before cutting. Score the surface first to guide precise cuts, ensuring even portions and a professional finish.
5.1 Scoring the Cake Surface
Scoring the cake surface creates a guideline for cutting, ensuring precise and even slices. Use a spatula or knife to lightly mark the cake where you plan to cut. This technique helps prevent the cake from cracking or breaking, allowing for clean, uniform portions. It also reduces waste and ensures every slice looks professional and consistent.
5.2 Using Guides for Precision
Using printable cutting guides or templates ensures uniform slices and precision. These tools help mark exact cutting lines, especially for round or tiered cakes. Guides minimize waste and guarantee consistent portions, making serving easier; They are particularly useful for large events or layer cakes, ensuring every slice is identical in size and appearance. This method enhances presentation and satisfaction.
Presentation and Serving
Presentation enhances the appeal of your cake. Arrange slices neatly on a platter, garnish with fresh flowers or berries, and use decorative serving dishes for an attractive display.
6.1 Arranging Slices Attractively
Arrange slices in a symmetrical pattern on a decorative platter or tiered stand. Garnish with fresh flowers, berries, or edible decorations. For a modern look, alternate slice sizes and angles. Ensure even spacing to create a visually appealing display that enhances the cake’s presentation and makes it a centerpiece of the event.
6.2 Making an Appealing Presentation
Presentation enhances the appeal of your cake. Use a decorative platter or tiered stand to display slices. Garnish with fresh flowers, berries, or edible decorations for color. Arrange slices at varying angles to add visual interest. Ensure even spacing and balance to create an attractive display. Proper lighting can highlight the cake’s details, making it a stunning centerpiece for any event or gathering.
Common Mistakes to Avoid
Common mistakes include using a dull knife, applying too much pressure, and not letting the cake cool. These errors can lead to crumbling or uneven slices.
7.1 Avoiding Crumbling and Breakage
To prevent crumbling, ensure the cake is completely cooled and use a serrated knife. Apply gentle, even pressure and avoid sawing motions. If the cake is fragile, refrigerate it briefly to firm up before cutting. Using a knife with a long, smooth edge can also help maintain the cake’s integrity during slicing.
7.2 Preventing Uneven Slices
To achieve uniform slices, use a serrated knife and maintain consistent pressure. Score the cake surface first to guide your cuts. For round cakes, start from the center and cut outward in even strokes. For square cakes, measure each slice to ensure equal size. Using a cake stand can help maintain stability, reducing the risk of uneven cuts and ensuring precision.