The Honeywell T4 Pro Programmable Thermostat offers efficient and user-friendly temperature control. Proper installation ensures safe operation, optimal performance, and compatibility with various HVAC systems. Begin by following the manufacturer’s guidelines to prepare for a seamless setup process;
1.1 Overview of the T4 Thermostat
The Honeywell T4 Pro Programmable Thermostat is a user-friendly device designed for efficient temperature control. It offers programmable scheduling, compatibility with gas boilers, and a sleek interface. Its compact design and advanced features make it ideal for managing heating and cooling systems, ensuring comfort and energy efficiency in residential settings.
1.2 Importance of Proper Installation
Proper installation of the T4 thermostat ensures safe operation, optimal performance, and compatibility with your HVAC system. Incorrect installation can lead to safety hazards, reduced efficiency, or system malfunctions. Always follow the manufacturer’s guidelines to guarantee reliable functionality and energy efficiency, maximizing your home’s comfort and minimizing potential issues.
Pre-Installation Preparation
Before installing the T4 thermostat, ensure compatibility with your HVAC system, gather all necessary tools and materials, and take essential safety precautions to avoid potential hazards.
2.1 Checking Compatibility with Your HVAC System
Verify the Honeywell T4 Pro Thermostat compatibility with your HVAC system voltage, fuel type, and heating/cooling stages. Ensure it supports 24-230V systems but note it’s not compatible with 230V electric heating. Check system type, such as gas boilers or zone-valve systems, to confirm suitability.
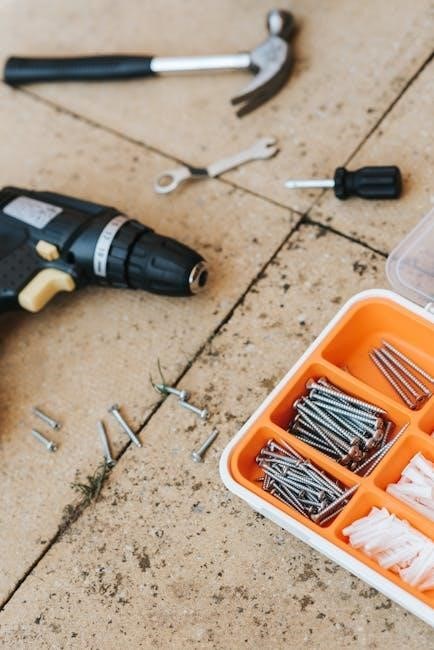
2.2 Gathering Necessary Tools and Materials
Gather a screwdriver, pliers, voltage tester, and wire strippers for wiring. Ensure you have the T4 Pro Thermostat, UWP mounting system, wall anchors, and fresh AA alkaline batteries. Refer to the official manual for specific tools and materials tailored to your installation needs.
2.3 Safety Precautions Before Starting
Always disconnect power at the breaker box before starting installation. Ensure the furnace door is closed securely and avoid damaging wires during setup. Use protective gear and follow manufacturer guidelines to prevent electrical hazards and ensure a safe installation process.
Installation Steps
The T4 thermostat installation involves separating the wallplate, connecting wires, mounting the device, and powering up the system. Follow manufacturer guidelines for a smooth process.
3.1 Removing the Old Thermostat
Begin by switching off the power to your HVAC system. Remove the batteries from the old thermostat and gently detach it from the wallplate. Carefully disconnect the wires, ensuring no damage occurs. This step ensures a safe and efficient installation process for your new T4 thermostat.
3.2 Wiring the T4 Thermostat
Start by separating the wallplate from the thermostat. Use a screwdriver to open the terminal cover and connect the wires according to the provided wiring diagram. Ensure the power is off before starting. Once connected, turn the power back on and test the system to ensure proper functionality.
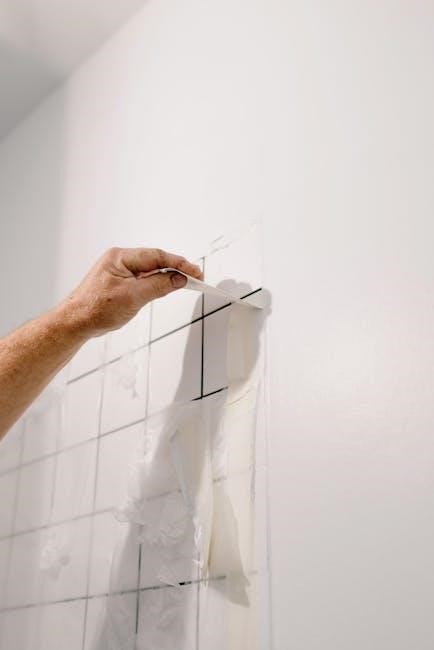
3.3 Mounting the Thermostat on the Wall
Mounting the T4 thermostat on the wall involves attaching the wallplate using screws. Ensure the wallplate is level and securely fastened. Once the wallplate is installed, clip the thermostat onto it. This ensures a stable and proper installation, ready for wiring and configuration.
3.4 Connecting the Wallplate and Thermostat
After mounting, separate the wallplate from the thermostat. Connect the wires according to the wiring diagram, ensuring proper terminals are used. Once wired, clip the thermostat onto the wallplate, aligning it securely. This ensures a stable connection and proper functionality of the device.
Configuring the T4 Thermostat
Configure the T4 thermostat by navigating the menu to set temperature schedules, enable advanced features, and customize settings. Refer to the official manual for detailed guidance on programming and optimizing your thermostat’s performance for efficient heating and cooling control.
4.1 Setting Up the Thermostat Menu
Access the T4 thermostat menu by pressing and holding the Menu button. Use the Plus or Minus buttons to navigate through options. Adjust settings like temperature limits, scheduling, and advanced features. Ensure all configurations align with your HVAC system requirements for optimal performance. Refer to the manual for detailed guidance on customization.
4.2 Programming Temperature Schedules
Access the scheduling section via the Menu button. Use Plus or Minus buttons to navigate and set desired temperatures for different times. Create separate schedules for weekdays and weekends if needed. Adjust settings carefully and save to ensure proper operation. Test the schedule to confirm accuracy and make any necessary adjustments.
4.3 Enabling Advanced Features
Access advanced settings via the Menu button and select “Advanced Features.” Enable options like geofencing or smart recovery by using the Plus or Minus buttons. Confirm selections by pressing the center button. Adjust settings as needed and save changes to ensure optimal performance and energy efficiency. Test features to verify functionality.

Testing the Thermostat
Power up the system and perform a functional test to ensure the thermostat controls heating and cooling operations effectively. Verify all settings and features work correctly.
5.1 Powering Up the System
After installation, switch the HVAC system’s power back on at the breaker box. Ensure the thermostat is properly connected and the furnace door is securely closed. Insert fresh AA alkaline batteries if required. The thermostat’s screen should light up, indicating it’s ready for testing.
5.2 Performing a Functional Test
Power up the system and conduct a quick functional test. Set the thermostat to heat or cool mode and adjust the temperature to activate the HVAC system. Verify that the system responds correctly and cycles on/off as expected. Ensure all buttons and menu options are functioning properly for seamless operation.
5.3 Verifying Heating and Cooling Operations
Ensure the heating and cooling systems operate correctly. Check that the thermostat switches between modes smoothly. Verify temperature accuracy and consistent cycling. Confirm that the system meets the setpoint and maintains desired conditions. Proper operation ensures energy efficiency and comfort, aligning with the T4 thermostat’s advanced features and settings.
Troubleshooting Common Issues
Identify and resolve issues like wiring problems, display malfunctions, or temperature control errors. Refer to the manual for steps to address each specific concern effectively.
6.1 Resolving Wiring Connection Problems
Ensure all wires are securely connected to the correct terminals on both the thermostat and wallplate. Refer to the wiring diagram in the manual for proper connections. If issues persist, verify the HVAC system’s compatibility and consult a professional if necessary to avoid system malfunctions or safety hazards.
6.2 Addressing Display or Power Issues
Check the circuit breaker or HVAC switch to ensure power is on. Replace batteries if the display is dim or unresponsive. Restart the thermostat by removing and reinserting batteries. Adjust screen brightness settings if necessary. Ensure proper installation and consult the manual for firmware updates or display calibration instructions.
6.3 Fixing Temperature Control Problems
Check the temperature settings to ensure they are accurate. Verify wiring connections for proper function. Calibrate the thermostat sensor if necessary. Restart the system after adjusting settings. Ensure the HVAC system is compatible with the thermostat. Consult the manual for advanced calibration options or firmware updates to resolve persistent issues effectively.
Maintenance and Upkeep
Regularly clean the thermostat to prevent dust buildup. Replace batteries every 6-12 months for optimal performance. Update software or firmware to ensure functionality. Inspect wiring connections to avoid issues and maintain energy efficiency.
7.1 Cleaning the Thermostat
Power down your HVAC system before cleaning. Use a soft, dry cloth to wipe the thermostat’s surface. Avoid liquids or harsh chemicals to prevent damage. Gently remove any dust or debris from the display and vents. Regular cleaning ensures accurate temperature readings and optimal performance. Allow the thermostat to dry completely before restarting the system.
7.2 Replacing Batteries
Power down your HVAC system before replacing batteries. Remove the old batteries from the thermostat and insert fresh AA alkaline batteries, ensuring correct polarity. Avoid mixing old and new batteries. Properly dispose of used batteries. This ensures reliable operation and prevents system malfunctions. Always follow safety guidelines when handling batteries.
7.3 Updating Software or Firmware
Regular software updates ensure optimal performance and security. Use the Honeywell T4 installation guide for Wi-Fi-enabled updates or manually update via USB. Press Menu, then OK, and navigate to the update option using Plus or Minus buttons. Always power down the HVAC system before updating to avoid disruptions and ensure a stable installation process.

Safety Considerations
Always disconnect power at the breaker before installation. Ensure the furnace door is closed securely and use fresh AA alkaline batteries. Follow all safety guidelines carefully to avoid hazards and ensure compliance with local regulations for a safe and reliable T4 thermostat installation process.
8.1 Ensuring Proper Installation for Safe Operation
Proper installation is critical for safe operation of the T4 thermostat. Always disconnect power at the circuit breaker before starting. Ensure the furnace door is closed securely and verify correct wiring connections. Use fresh AA alkaline batteries and follow the manufacturer’s guidelines to prevent electrical hazards and ensure reliable performance. This step is essential for maintaining safety and efficiency.
8.2 Avoiding Common Safety Hazards
To avoid safety hazards, ensure the T4 thermostat is installed by a competent person. Never attempt installation near open flames or sparks. Keep the area clear of combustible materials. Always follow the manufacturer’s instructions and local regulations to prevent electrical shocks or system malfunctions. Regular maintenance is also crucial for ongoing safety.
8.3 Compliance with Local Regulations
Ensure the T4 thermostat installation complies with local electrical and safety regulations. Verify compatibility with voltage requirements, such as 24-230V systems. Always use certified installers and adhere to regional codes to avoid legal issues and ensure safe operation. Non-compliance may result in system malfunctions or safety risks.
Successful T4 thermostat installation ensures efficient temperature control. For further assistance, refer to the official Honeywell manual or visit their website for troubleshooting guides and customer support.
9.1 Summary of Key Installation Steps
Separate the wallplate from the thermostat, connect wires according to the wiring diagram, and mount the device securely. Power up the system, perform a functional test, and ensure all operations, including heating and cooling, are verified for proper performance and efficiency.
9.2 Accessing Official Manuals and Guides
Visit Honeywell’s official website to download the T4 Pro Programmable Thermostat installation manual and user guide. These resources provide detailed step-by-step instructions, wiring diagrams, and troubleshooting tips to ensure a successful and safe installation process for your thermostat.
9.3 Contacting Customer Support for Assistance
For any installation or operational issues, contact Honeywell’s customer support team. Visit their official website for assistance options, including live chat, phone support, and email. Their dedicated team is available to provide troubleshooting guidance and resolve any concerns related to your T4 Pro Programmable Thermostat.