Taylor Indoor Outdoor Thermometer Instructions: A Comprehensive Guide
Ensure accurate temperature readings for cooking and preserving with Taylor’s precision instruments; batteries are included for immediate use‚ simplifying your tasks today․
Understanding Your Taylor Thermometer
Taylor thermometers are designed for precision‚ offering reliable temperature monitoring for both indoor and outdoor environments․ These instruments range from simple analog models to advanced digital versions with wireless remote sensors․
Understanding the specific features of your Taylor thermometer is crucial for accurate readings․ Whether you’re monitoring meat temperatures for cooking‚ checking jam consistency during preserving‚ or tracking ambient conditions‚ knowing how your device functions ensures optimal results․
The included batteries facilitate immediate use‚ removing initial setup hurdles and allowing you to quickly begin benefiting from precise temperature data․
Key Features and Benefits
Taylor thermometers boast several key advantages‚ starting with their precision in measuring temperatures for diverse applications – from culinary tasks like cooking meat and making jam‚ to monitoring environmental conditions․
The inclusion of batteries streamlines the user experience‚ enabling immediate operation without the need for separate purchases․ Easy-to-read displays‚ whether digital or analog‚ ensure quick and accurate temperature assessment․
Ultimately‚ Taylor thermometers eliminate guesswork‚ providing confidence in your results and contributing to successful outcomes in both the kitchen and beyond․
Types of Taylor Indoor Outdoor Thermometers
Taylor offers a diverse range of thermometers to suit various needs․ Digital models provide precise readings with features like backlit displays and min/max temperature recording․
Traditional analog thermometers offer a classic‚ reliable approach to temperature monitoring‚ utilizing easy-to-read scales․ For remote monitoring‚ Taylor provides wireless thermometers equipped with sensors that transmit outdoor temperatures to a base unit indoors․
These options cater to different preferences and applications‚ ensuring a Taylor thermometer is available for every user seeking accurate and convenient temperature measurement․
Digital Thermometers
Taylor’s digital indoor outdoor thermometers boast exceptional accuracy and user-friendly features․ These models typically include a clear‚ backlit LCD display for easy reading‚ even in low-light conditions․
Many digital units feature programmable functions like min/max temperature memory‚ allowing you to track temperature fluctuations over time․ Some also incorporate frost alerts‚ warning you of potentially damaging freezing temperatures․
Their precise sensors and digital processing ensure reliable temperature data for both indoor comfort and outdoor monitoring․
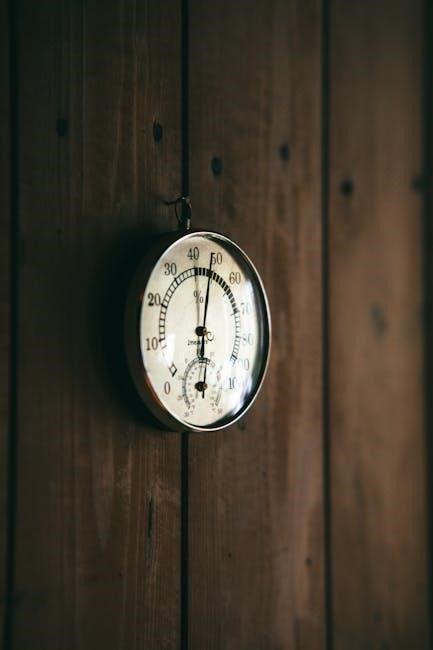
Analog Thermometers
Taylor’s analog indoor outdoor thermometers offer a classic and reliable method for temperature measurement․ Featuring a traditional dial display‚ these thermometers provide a quick and intuitive visual reading․
They operate without batteries‚ making them a dependable choice for areas without easy access to power․ The durable construction ensures longevity‚ while the clearly marked scale allows for precise temperature assessment․
Analog models are ideal for those who prefer a straightforward‚ no-fuss approach to temperature monitoring‚ offering consistent performance․
Wireless Thermometers with Remote Sensors
Taylor’s wireless indoor outdoor thermometers provide convenient remote temperature monitoring․ These systems utilize a wireless sensor placed outdoors to transmit temperature data to a receiver unit displayed indoors․

This eliminates the need to physically check the outside temperature‚ offering real-time updates from the comfort of your home․ Many models feature extended wireless ranges and clear‚ easy-to-read displays․
Ideal for monitoring conditions across larger properties‚ these thermometers offer both convenience and accuracy․
Setting Up Your Thermometer
Proper setup is crucial for accurate readings․ Begin by installing batteries‚ ensuring correct polarity as indicated in the device․ Next‚ consider mounting options – Taylor thermometers can be placed on a tabletop or securely mounted to a wall using provided hardware․
For optimal performance‚ especially with outdoor sensors‚ careful sensor placement is key․ Avoid direct sunlight and areas exposed to precipitation to prevent inaccurate readings․ Ensure a strong wireless signal if applicable․
Installing Batteries
Battery installation powers your Taylor thermometer for reliable operation․ Typically‚ these thermometers require standard AAA or AA batteries – check your model’s specifications․ Locate the battery compartment‚ usually on the back of the unit‚ and open it carefully․
Insert the batteries‚ strictly adhering to the polarity markings (+ and -) inside the compartment․ Incorrect installation can damage the device․ Close the compartment securely․ Batteries are often included‚ providing immediate usability‚ but replacements should be high-quality for consistent performance․
Mounting Options (Wall‚ Tabletop)
Taylor thermometers offer versatile mounting for optimal viewing․ Many models feature a keyhole slot on the back for easy wall mounting using a screw or nail․ Ensure the screw/nail is appropriate for your wall type․ Alternatively‚ most thermometers are designed to stand stably on a flat surface‚ perfect for tabletop placement․
Consider the location; avoid direct sunlight or areas with extreme temperature fluctuations․ Proper placement ensures accurate readings․ Some models may include a small kickstand for improved tabletop viewing angle․ Secure mounting prevents accidental drops and damage․
Sensor Placement for Outdoor Readings

Accurate outdoor temperature relies on proper sensor placement․ Position the remote sensor away from direct sunlight‚ rain‚ and snow – ideally under an eave or sheltered area․ Avoid proximity to heat sources like vents or chimneys․ Mount the sensor at least 6 feet above the ground for representative readings․
Ensure clear transmission to the main unit; minimize obstructions like thick walls․ Regularly check the sensor for debris or ice buildup․ Proper placement prevents inaccurate readings caused by localized conditions․ Securely fasten the sensor to prevent movement from wind․

Reading and Interpreting Temperature
Understanding your Taylor thermometer’s display is crucial for accurate readings․ Digital models present temperature directly on the screen‚ often with selectable units (°F or °C)․ Analog thermometers utilize a scale; carefully observe the pointer’s position․ Ideal indoor temperature ranges between 68-72°F (20-22°C) for comfort․
Outdoor readings require consideration of weather conditions․ Be mindful of potential extremes; frost warnings or heat advisories․ Regularly check readings to monitor changes․ Accurate interpretation ensures informed decisions regarding heating‚ cooling‚ and outdoor activities․

Understanding the Display (Digital Models)
Taylor digital thermometers feature clear LCD displays showing both indoor and outdoor temperatures simultaneously․ Look for unit selection buttons to toggle between Fahrenheit and Celsius․ Some models include icons indicating trends – rising‚ falling‚ or steady temperatures․ Pay attention to any low battery indicators‚ as these can affect accuracy․
Many digital units also display minimum and maximum recorded temperatures․ Familiarize yourself with the button functions to access these features․ Ensure the display is unobstructed for easy reading‚ and note any specific symbols indicating frost alerts or comfort levels․
Reading the Thermometer Scale (Analog Models)
Taylor analog thermometers utilize a traditional scale‚ typically with Fahrenheit and Celsius markings․ Locate the pointer indicating the current temperature; read the value where it aligns with the scale․ Observe the scale carefully‚ noting the increments – often in one or two-degree intervals․

For outdoor readings‚ identify the separate scale or pointer dedicated to external temperature․ Ensure your viewing angle is direct to avoid parallax errors․ Regularly check the glass for cracks or damage‚ as this can affect accuracy․ Understand the scale’s range to interpret readings correctly․
Indoor Temperature Range & Ideal Settings
Taylor thermometers typically measure indoor temperatures between 32°F to 122°F (0°C to 50°C)․ The ideal indoor temperature for comfort generally falls between 68°F to 78°F (20°C to 26°C)‚ though personal preference varies․ Maintaining a consistent temperature promotes well-being and energy efficiency․
Slight variations are acceptable; however‚ extreme temperatures can impact health and home structure․ Monitor humidity levels alongside temperature‚ as they influence perceived comfort․ Consider adjusting settings based on activity level and time of day for optimal indoor climate control․
Outdoor Temperature Range & Considerations
Taylor outdoor sensors generally operate within a range of -40°F to 158°F (-40°C to 70°C)․ However‚ accuracy can be affected by direct sunlight‚ precipitation‚ and wind․ Proper sensor placement is crucial – avoid areas with excessive exposure․
Consider the thermometer’s limitations in extreme weather conditions․ Frost or ice buildup can interfere with readings․ Regularly check the sensor for obstructions and ensure proper ventilation․ Monitor for significant temperature fluctuations‚ especially during rapid weather changes‚ and adjust accordingly․
Calibration and Accuracy
Maintaining accuracy is vital for reliable temperature monitoring․ While Taylor thermometers are pre-calibrated‚ periodic checks are recommended‚ especially after battery changes or significant temperature shifts․ Calibration ensures readings align with a known standard – using a certified thermometer for comparison is best practice․
Inaccurate readings can stem from sensor placement‚ battery levels‚ or internal component drift․ If discrepancies arise‚ consult the user manual for specific calibration procedures․ Regular calibration extends the lifespan and trustworthiness of your Taylor thermometer‚ providing consistent results․
Why Calibration is Important
Calibration ensures your Taylor thermometer delivers precise temperature readings‚ crucial for applications like cooking‚ preserving‚ and monitoring environmental conditions․ Without calibration‚ readings can drift over time‚ leading to inaccurate assessments and potentially unsafe outcomes – especially when dealing with food temperatures․
Accurate temperature control is paramount for food safety‚ preventing bacterial growth and ensuring optimal results in culinary endeavors․ Calibration validates the thermometer’s performance‚ providing confidence in its measurements and safeguarding against errors․ Regular checks maintain reliability and extend the instrument’s useful life․
How to Calibrate Your Taylor Thermometer

To calibrate‚ compare your Taylor thermometer to a known accurate reference point‚ like boiling water (212°F/100°C) or an ice bath (32°F/0°C)․ Submerge the thermometer’s probe into the reference substance‚ ensuring it doesn’t touch the container’s sides or bottom․
For digital models‚ use the calibration button (if equipped) to adjust the reading to match the reference temperature․ Analog thermometers may have a small adjustment screw on the back; carefully turn it until the needle aligns with the correct value․ Repeat the process to verify accuracy․

Troubleshooting Inaccurate Readings
If your Taylor thermometer displays incorrect temperatures‚ first ensure proper sensor placement‚ avoiding direct sunlight or heat sources․ Check battery levels; low batteries can cause erratic readings․ Recalibrate the thermometer following the instructions in the calibration section․
For wireless models‚ verify sensor connectivity and range․ If issues persist‚ try resetting the thermometer or replacing the batteries․ Ensure the thermometer isn’t exposed to extreme temperatures or humidity‚ which can affect accuracy․ Contact Taylor support if problems continue․
Using Specific Features
Taylor thermometers offer features enhancing usability․ Utilize the Min/Max temperature recording to track temperature fluctuations over time‚ ideal for monitoring overnight lows or cooking processes․ The Frost Alert functionality warns of potential freezing conditions‚ protecting plants and pipes․
Comfort Level Indicators provide a quick assessment of indoor climate․ Explore digital models’ programmable settings for customized alerts․ Refer to your specific model’s manual for detailed instructions on accessing and utilizing these features effectively‚ maximizing your thermometer’s potential․
Min/Max Temperature Recording
Taylor thermometers with Min/Max recording automatically store the highest and lowest temperatures reached within a 24-hour period․ This feature is invaluable for understanding temperature extremes‚ particularly useful for gardeners monitoring frost risks or cooks tracking oven performance․
To view recorded values‚ typically a button press cycles through current‚ minimum‚ and maximum readings․ Resetting the memory is often done by holding the button for a few seconds․ Consult your model’s manual for precise instructions‚ ensuring accurate data interpretation and optimal use of this helpful function․
Frost Alert Functionality
Certain Taylor outdoor thermometers incorporate a frost alert feature‚ designed to warn you of potentially damaging freezing temperatures․ This typically involves setting a low-temperature threshold – often around 32°F (0°C)․
When the outdoor temperature drops below this set point‚ an audible alarm or a visual indicator (like a flashing light) activates․ This provides crucial time to protect sensitive plants‚ bring pets indoors‚ or take other preventative measures․ Refer to your specific model’s instructions to properly configure and utilize the frost alert system effectively․
Comfort Level Indicators
Many Taylor indoor/outdoor thermometers feature comfort level indicators‚ providing a quick assessment of your home environment․ These indicators often use icons or descriptive terms – such as “Comfortable‚” “Dry‚” “Wet‚” or “Hot” – to represent the current humidity and temperature combination․
This allows for easy understanding of whether adjustments to your heating‚ cooling‚ or humidification systems are needed․ The indicators are based on established comfort ranges‚ offering a convenient way to maintain an ideal indoor climate for health and well-being․ Consult your model’s manual for specific indicator meanings․
Maintenance and Care
To ensure the longevity and accuracy of your Taylor thermometer‚ regular maintenance is key․ Cleaning should be done with a soft‚ damp cloth – avoid harsh chemicals or abrasive cleaners that could damage the display or casing․ Battery replacement is crucial when the display becomes dim or erratic; always use the correct battery type as specified in the manual․
Proper storage when not in use‚ away from extreme temperatures and direct sunlight‚ will also help preserve its functionality․ Regular care guarantees reliable temperature readings for years to come․

Cleaning Your Thermometer
Maintaining a clean thermometer is essential for accurate readings and a prolonged lifespan․ Use a soft‚ slightly damp cloth to gently wipe the exterior casing and display screen․ Avoid abrasive cleaners‚ solvents‚ or harsh chemicals‚ as these can damage the plastic and electronic components․
For stubborn marks‚ a mild soap solution can be used‚ but ensure the cloth is only damp‚ not wet․ Never immerse the thermometer in water or any other liquid․ Regular‚ gentle cleaning will keep your Taylor thermometer functioning optimally․
Battery Replacement Guidelines
To ensure continuous operation‚ replace batteries when the display becomes dim or erratic․ Refer to your thermometer’s model number to determine the correct battery type – typically AA or AAA․ Open the battery compartment located on the back or side of the unit‚ using a small screwdriver if necessary․
Insert new batteries matching the polarity markings (+ and -) inside the compartment․ Dispose of old batteries responsibly at a designated recycling location․ Always replace all batteries at once for optimal performance and avoid mixing old and new batteries․

Storage Recommendations
When not in use for extended periods‚ remove the batteries from your Taylor thermometer to prevent corrosion and potential damage․ Store the thermometer in a cool‚ dry place away from direct sunlight and extreme temperatures․ Avoid storing it in areas with high humidity or near corrosive materials․
Protect the thermometer from dust and debris by covering it with a soft cloth or storing it in its original packaging․ Handle the unit with care to avoid dropping or impacting it‚ which could affect its accuracy․ Regularly inspect the thermometer for any signs of damage before storage․
Troubleshooting Common Issues
If the display is blank‚ first check the battery compartment and ensure batteries are correctly installed with proper polarity․ Replace batteries if they are old or depleted․ For inaccurate readings‚ verify correct sensor placement and avoid direct sunlight exposure․ Wireless models experiencing connectivity issues may require repositioning the sensor closer to the display unit․
Ensure no obstructions interfere with the wireless signal․ If problems persist‚ try resetting the thermometer according to the manufacturer’s instructions․ Consult the user manual for specific troubleshooting steps related to your model․
No Display/Power Issues
A completely blank display typically indicates a power problem․ First‚ verify battery installation‚ ensuring correct polarity (+ and -)․ Old or weak batteries are the most common cause; replace them with fresh ones of the correct type․ Check the battery compartment for corrosion or debris that might interrupt the connection․
If the issue persists after battery replacement‚ the thermometer itself may be faulty․ Inspect the battery contacts for damage․ Consider testing with a known-good set of batteries to rule out battery-related problems definitively․
Incorrect Temperature Readings
Consistently inaccurate readings suggest a need for calibration or a potential sensor issue․ First‚ ensure proper sensor placement – avoid direct sunlight or heat sources for outdoor sensors․ Verify the thermometer isn’t exposed to extreme temperatures beyond its specified range․
If readings remain off‚ attempt calibration (see the ‘Calibration and Accuracy’ section)․ If calibration fails‚ the sensor may be damaged․ Contact Taylor’s customer support for assistance or potential replacement options‚ especially if the unit is still under warranty․
Sensor Connectivity Problems (Wireless Models)
If the outdoor sensor isn’t transmitting‚ check the batteries in both the sensor and the main unit – low batteries are a common cause․ Ensure the sensor is within the specified range of the receiver; distance and obstructions (walls‚ metal) can interfere․
Try re-syncing the sensor following the instructions in the ‘Setting Up Your Thermometer’ section․ If problems persist‚ briefly remove and reinsert the batteries in both units to reset the connection․ Contact Taylor support if re-syncing doesn’t resolve the issue․
Safety Precautions
Always handle batteries with care‚ keeping them away from children and pets․ Do not mix old and new batteries‚ or different battery types․ Dispose of used batteries responsibly‚ following local regulations for electronic waste; Avoid exposing the thermometer to extreme temperatures or humidity‚ as this can damage the device․
Do not attempt to disassemble or repair the thermometer yourself; this could lead to electric shock or inaccurate readings․ Clean the thermometer with a damp cloth only – avoid harsh chemicals․ Handle the thermometer gently to prevent damage․
Battery Safety
Always insert batteries with the correct polarity‚ as indicated inside the battery compartment․ Do not short-circuit the batteries‚ or expose them to fire or excessive heat․ Remove batteries if the thermometer will not be used for an extended period to prevent leakage and corrosion․ Keep batteries out of reach of children and pets‚ as they can be harmful if swallowed․
Dispose of used batteries properly at designated recycling locations; do not discard them with general household waste․ Avoid mixing old and new batteries‚ or different types of batteries․ Leaking batteries can cause irritation – avoid contact with skin and eyes․
Environmental Considerations
Consider the placement of your outdoor sensor to minimize its impact on local wildlife and vegetation․ Avoid direct sunlight exposure for prolonged periods‚ which can affect both the sensor’s accuracy and its lifespan․ Properly dispose of the thermometer and its components at the end of its life‚ following local electronic waste regulations․
Reduce battery waste by using rechargeable batteries where applicable and recycling used batteries responsibly․ Minimize packaging waste by reusing or recycling the original packaging materials․ Be mindful of energy consumption – remove batteries when the device isn’t in use․
General Handling Guidelines
Handle the Taylor thermometer with care to avoid dropping or subjecting it to strong impacts‚ which could damage the internal components․ Avoid exposing the thermometer to extreme temperatures or humidity‚ as this may affect its accuracy and functionality․ Do not attempt to disassemble or repair the thermometer yourself; this could void the warranty and pose a safety risk․
Clean the thermometer regularly with a soft‚ damp cloth to remove dust and dirt․ Keep the thermometer away from children and pets․ Store the thermometer in a cool‚ dry place when not in use to prolong its lifespan․